“It’s not difficult, just unfamiliar”    


       </iframe>"        

 
   Knowledge creates comfort. If you know what’s going to happen next, if you are physically and mentally prepared for a motion, you w

 
“It’s not difficult, just unfamiliar”
 

Knowledge creates comfort. If you know what’s going to happen next, if you are physically and mentally prepared for a motion, you will act out of a place of familiarity, not unfamiliarity.

There’s a quote I absolutely love that perfectly describes what I’m talking about: “It’s not difficult, just unfamiliar”. If you are prepared for whatever is going to happen next, you are less likely to perceive situations/sections/motions, etc. as a challenge. Challenges and unfamiliar situations have a tendency to push us towards a fight or flight mode (remember the lion?) which causes our muscles to tense up.

Always Be One Step Ahead:
-hear ahead
-feel ahead
-tap ahead
-sing ahead
-speak ahead
-look/read ahead

String Crossings:
-set up as chords (or put down the following note/finger ahead of time)
-be on the next string level ahead of time (right arm)
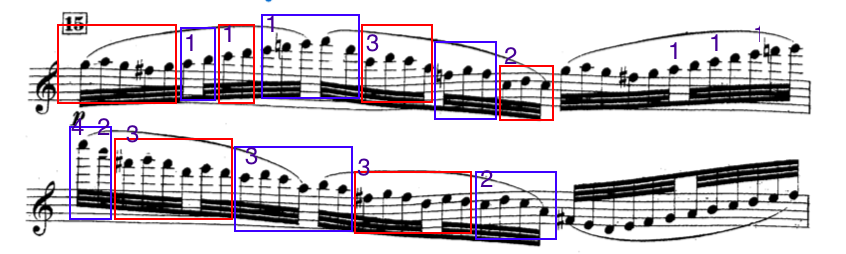
Runs:
-hear/sing next note ahead of time
-tap groups of 2,3, 4 fingers at the same time (practice patterns)
-say next finger number ahead of time

Shifts:
-tap (don’t look at) the position you are going to shift into
-sing upcoming note
-have your arms in position of the upcoming note

Vibrato:
-vibrate upcoming note ahead of time (by placing the finger on the higher or lower string ahead of time)
-feel the next finger and make sure to keep it loose
-practice vibrating two, or three fingers at the same time

Tricky Bowings:
-say “up” or “down” ahead of time

Stopping the Bow:
Most of you have heard me say this over and over again- “Stop the bow!”
Stopping the bow gives you enough time to prepare yourself for what’s coming next. Taking a break  makes you more aware of the present moment and the information that needs to be processed next.


   96 


   Normal 
   0 


   false 
   false 
   false 
   
   EN-US 
   X-NONE 
   X-NONE 


"If you aren't noticing yourself moving forward, you're probably already on top"


The Everest Effect: Monitoring Your Progess

Keeping a practice diary will not only help you monitor your progress and motivate you, but will also organize your daily practice sessions. Focusing on specific aspects of playing and taking notes, documenting your observations and ideas, will not only make you a better player, but also a better teacher to yourself and others.

Here is an example of how you could organize your diary: 

1)    Determine a “Focus of The Day”

2)    Main Category:   
               - Scales
               -Double Stops
               -Bow Technique
               -Repertoire

       3)   Subcategory:      
              -Posture
              -Bow/Right Arm
              -Left Hand

       4) Additional Subcategories:
             -Double Stops
             -String Crossings
             -Chords
             -Legato
               ETC.

       5) Separate Section for Practice Schedules
            - for busy days: plan out your practice in minutes, categories, breaks, etc.

Here is an example of what a practice diary entry may look like. In my video, I’m giving more detailed instructions.


    "Taking a closer look might be scary- but it's necessary"  


       </iframe>"               

 
      Simply playing through a challenging section (when you are not ready) can add weeks or even months (

"Taking a closer look might be scary- but it's necessary"


Simply playing through a challenging section (when you are not ready) can add weeks or even months (!) to your practice. Especially at the beginning, it's crucial to build difficult sections note by note and add bowings and rhythms gradually. Ease into it! 

I. Note by Note Without Rhythm

  • Sing ahead (sing the next note ahead of time)
  • Tap ahead (tap the next finger a few times before playing)
  • Say finger number ahead (say the next finger number before playing it)
  • Play along with a drone for reference

II. Introducing Bowings (higher difficulty level)

  • slur two notes, then three, etc.
  • add random rhythms or bowings                                                                                              Important side note: While still in the process of practice, don’t add the rhythm or bowing of your piece -this helps to avoid rushing through the piece.

III. Finger Patterns

  • group notes that are on either one string or in the same position (view example)
  •  put all fingers of one group down at the same time (if this is difficult, tap them a few times). To make sure they are in tune, play them back starting on the highest note.

IV. Connectors (string crossings and shifts)

Once you are comfortable with individual finger patterns, focus on connectors. Since the groups are either split by string crossings or shifts this is convenient!

  • speed up individual patterns but make sure to make a clear stop after each pattern.
  • once you reach the end of a pattern, say either “shift” or “string crossing” ahead of time and be really aware of the connecting motion. Don’t ever rush connectors while practicing!

V. Get Comfortable

  • Once you have passed stage I-IV you should be ready to put everything together.
  • To make sure everything’s in place, play along with a slowed down recording first.


    "Don't practice scales,   practice with scales!"  


       </iframe>"               

 
    Scales Translate Complexity    As mentioned in my video, it’s important to remember that a scale is a  tool  th

"Don't practice scales, practice with scales!"

Scales Translate Complexity

As mentioned in my video, it’s important to remember that a scale is a tool that helps us understand the micro-components within a complex combination of patterns: a piece of music. If used correctly, a scale can unravel the most challenging (looking) piece and turn it into something we can easily understand and become familiar with. 

Here is an exercise that will teach you how to use a scale to your advantage:                              

(This exercise focuses mainly on bowing patterns and bow technique)

  •       Mark bowing patterns in your piece (in different colors)
  •       Practice these bowings on a scale of your choice
  •       Later, add dynamics, accents, vibrato, and general musical expression
  •       Once you are comfortable with the bowings while playing a scale, play the notes as written

Important Side Note: Make sure to only practice one bowing pattern at a time! For example: Day I- green bowing pattern only, Day II- blue bowing pattern only, etc.  If the patterns are simple you can do two or three per day, just make sure not to combine them before you are done practicing all of them separately!

Teaching your brain certain patterns is a very effective and time efficient way to practice. Constant repetition of a pattern teaches your body one specific motion, which activates your muscle memory. The reason why we are using colors to highlight patterns, is because they stimulate the visual sense and (when playing through the entire piece) work as a trigger, activating the associated physical motions.

In this LINK you’ll find an example of what this exercise could look like. I’ve worked through the first two pages. (Excerpt: Arensky Violin Concerto Op.54)


    "Once you face the lion, it will turn into a kitten"  


       </iframe>"        

 
   To start off with, play through your piece once, identify scary (lion) parts, and highlight them in a “non-threatening”

"Once you face the lion, it will turn into a kitten"
To start off with, play through your piece once, identify scary (lion) parts, and highlight them in a “non-threatening” way. I usually draw red hearts around them :) Once you have highlighted the sections, it’s time to turn the lion into a kitten- in other words- make it less scary. Below, I have listed a few strategies; I recommend you trying one per day:

The Lazy Lion:

Play in slow motion and breathe through the melody as you play. This will relax your body and help you prepare every movement carefully.

Lion with a Party Hat

Perform a section in different styles (classical, romantic, jazz, fiddle, etc.). Be silly! Overdo it! Laughter will relax your body. Focusing on style rather than technique will take your mind off of technical challenges. 

Dancing with the Lion

Sing through difficult sections while dancing, walking, or shaking out your hands or legs. Singing will not only help you get familiar with pitch, bow speed, rhythm, or phrasing,  but will also get you used to breathing through the entire section. If you move continuously while singing the melody, physical release will automatically be triggered once you actually play it. Side note: if a section is too difficult to sing, listen to it while moving around in the room.

Roaring Back

Make a difficult section scarier by either transposing the melody (playing in a higher position), speeding up the bowing, or adding physical movement (like walking around the room)- play the section twice and then return to playing it the way it’s written.

Lion in a Pink Tutu

Turn a scary section into a “second movement.” Convince yourself and your audience that what you are playing is part of a slow, romantic section. Vibrate every note, play musically and lyrically.

Making the Lion Disappear

If you can't see the lion, it's not actually there, right? This also works with difficult sections. If you can't hear yourself play, you are less likely to tense up or worry about playing out of tune. Play air violin for a change! Listen to a recording while "playing along" just above the string. If the tempo of the recording is too fast, slow it down with this program: http://onlinetonegenerator.com/time-stretcher.html